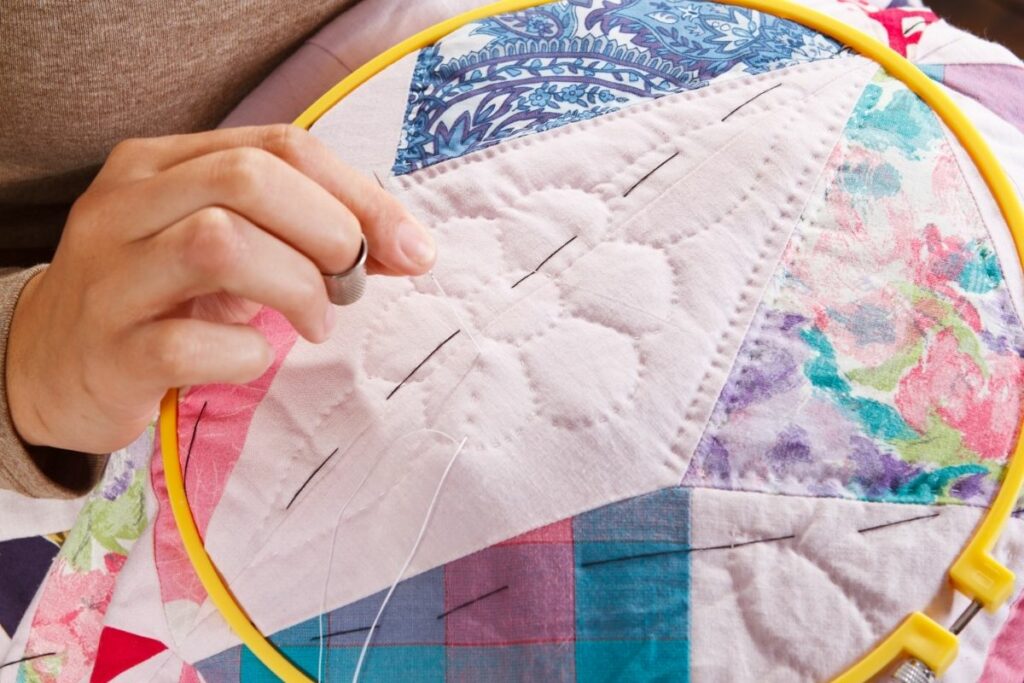
Quilting has become increasingly popular over the years. The technique involves stitching together fabric pieces into a decorative pattern, and can be done by either hand or machine.
The process of hand-tying a quilt requires a fair amount of practice, with some techniques considerably more efficient than others.
In this guide, I’ll take a closer look at the most effective way to hand-tie a quilt, including all the information you need to know about which material is best for the job.
What’s more, I’ll also look to answer a number of the frequently asked questions.
Which Material Is Best?
If you’re looking to tie a quilt which is washed and used on a regular basis, the best material to use is wool yarn.
While this is slightly more expensive and often more difficult to find compared to other materials, the best thing about wool yarn is the fact that the more you wash and use the quilt, the tighter the knots become.
It’s worth noting that acrylic yarn is less expensive and easier to find than wool yarn. Therefore, if you’re looking to make some pillowcases, a wall hanging, table runner, or any other item that won’t necessarily get used on a daily basis, acrylic yarn might be the best choice.
The biggest disadvantage to keep in mind when using acrylic yarn is that the ties can often come undone when washing the quilt.
So, after washing, it’s a good idea to give your quilt a quick check-over and re-tighten any ties that have loosened.
If, for example, one of the ties comes out, this isn’t the end of the world as you can easily swap it with a new one and no one will be able to tell the difference!
While most of the traditional tied quilts found online and at antique shops are made using yarn, there are lots of other suitable alternatives you can try – especially if you’d prefer a less bulky knot.
For instance, some people like to tie quilts with embroidery floss due to the fact that you can choose any color, as well as the ability to decide upon the amount of strands from the floss you can use.
Some other popular options include ribbon, perle cotton, crochet thread, and t-shirt “yarn”.
Step-By-Step Guide
In order to hand-tie a quilt effectively, it’s important to learn and understand the correct practice. With this in mind, listed below are five simple steps to follow.
Decide Where You Need To Tie Your Knots
The first thing you need to do is inspect your batting to see exactly how far apart they suggest you quilt. While you don’t always need to take this at face value, it’s a good idea to use it as a rough guide.
For example, a typical table centerpiece might require a knot every four inches, whereas something a little larger would need a greater distance between each knot.
To make this step easier, there are lots of things you can do. Some people use a ruler for exact measurements, while others use either a non-stain marking pen or eyeball the knot placement.
Thread Your Needle
When measuring the amount of yarn you need to cut, a good method is to measure from the middle of your collarbone to the tips of your fingers. This will leave you with a yard-length of material which is pretty much ideal.
You want to avoid having a piece of yarn that’s too short as this will require you to replace it every three to four knots. Similarly, you don’t want it to be too long as this will become frustrating having to constantly pull it through your quilt top.
An effective trick to keep in mind is to apply a small amount of Elmer’s school glue to one end of your yarn.
This will help it to lie flat and stiff, making it considerably easier to fit through the eye of your needle. If you’d prefer, you can also use a needle threader to help with this.
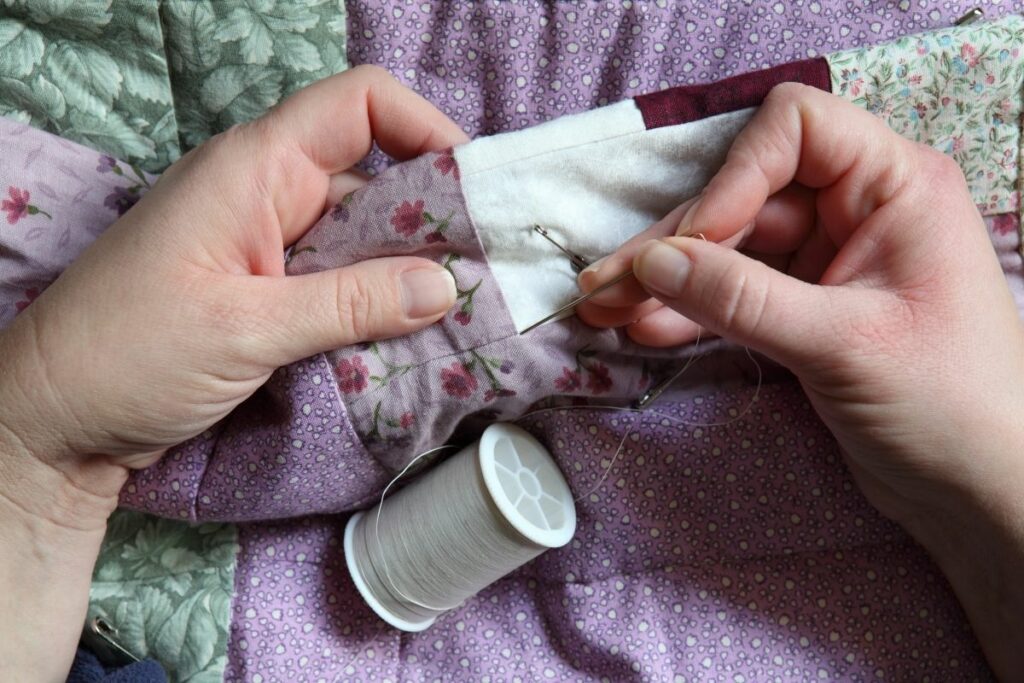
Begin Stitching
To start the stitching process, insert your needle into the quilt top. Just be mindful that the side you first insert your needle into will be the side that you finish the knot.
Pull the needle through the quilt until you have a tail of roughly two inches. If you need a little extra length for tying, then it’s a good idea to give yourself at least ½ inch extra.
Then, from the back of the quilt, insert your needle about ¼ inch away from where you first brought it through. Once you’ve done this, you’ll have successfully completed your first stitch!
As you continue stitching, make sure you keep inserting your needle through the top and then back up through the quilt next to your original stitch. This will ensure the stitch is held firmly in place if your knot comes undone for whatever reason.
Construct The Knot
There are several styles of knot you can use for hand-tying a quilt. For this guide, we’ll be taking a closer look at the square knot, also known as the “Hercules knot” or “reef knot”.
The first thing to do when making a square knot is to take the right tail of the yarn and place it over the left tail. Then, point the right tail down and through the loop that’s formed (almost like tying a shoelace).
You’ll then want to do exactly the same thing but the other way around. So, take the left tail and place it over the right tail, before pushing it through the loop.
Finally, tighten the yarn material, and you’ll have your square knot. The last thing to do is cut the tails of the yarn to the length you want. It’s usually a good idea to leave some length – around ½ inch.
Repeat The Process Until Complete
Now you’ve learned how to stitch and knot correctly, you’ll need to repeat the process all over your quilt top until it’s complete.
This can take quite a while depending on how large your quilt is, but it’ll definitely be worth it once you’ve got your new vintage-style quilt!
Frequently Asked Questions
What Is The Minimum Distance Apart That Ties Need To Be?
The minimum distance apart for tying a quilt is 2 inches. You need to make sure that there’s enough space between each piece of fabric so that they won’t get tangled up when you’re sewing them together.
How Can You Tie A Quilt With Bows?
You can use bows to tie a quilt. You just have to take care that the length of the bow is long enough to go around all the blocks in the quilt.
Make sure that it doesn’t look like a mess. Furthermore, it should also be tied neatly and evenly.
How Can You Tie A Quilt Using Buttons?
If you want to tie a quilt with buttons, then you should start from the center. Then, you should sew the button on top of the first row of stitches.
Next, you should stitch another row of stitches below the previous one. Continue doing this until you reach the end of the quilt.
How Can You Tie A Quilt By Machine?
If you want your quilt to look as neat and tidy as possible, then you should definitely learn how to tie a quilt by machine. All you need to do is to set the needle to the longest setting.
Then, you should start from the middle of the quilt, before moving towards the edges. Finally, you should sew two lines of stitches along the edge.
What Patterns Can You Create By Hand-Quilting?
There are a wide number of patterns that you can create by hand-quilting. Listed below are six of the most popular:
Flower Pattern – it looks beautiful and elegant. You can even add some leaves to it.
Star Pattern – it looks really cool. You can add some stars to it.
Stripes – these stripes will give your quilt an interesting appearance.
Chevron Pattern – it looks great too. You can add some flowers to it.
Honeycomb Pattern – this is a simple yet effective design. You can add some roses to it.
Heart Pattern – this is a classic design that everyone loves.
What Is The Easiest Quilt Pattern For A Beginner?
It’s hard to say which is the easiest quilt pattern for beginners because every beginner has different skills and preferences. However, listed below are a few ideas that might help you choose something suitable.
Square Patchwork – it’s easy to understand and follow.
Strips – it’s pretty much the same as squares, but strips are easier to work with.
Picot Edge – it’s similar to square patchwork, but it adds a little bit more interest.
The Bottom Line
To conclude, hand-tying a quilt might not be quite as popular in the modern quilt era as it once used to be, but it’s still a great skill to learn if you want to provide your beautiful new quilt with a vintage touch.
Hopefully, after reading the information in this guide, you’ll be in a much stronger position to successfully hand-tie a quilt at home!
My name is Sarah Maine and my hobby is quilting. No, I’m not retired - I’m in my early 20s and have been quilting since I was a teenager! Quilting and sewing are incredibly underrated hobbies in my opinion - and I want to bring them back.


")


