If you love nothing more than getting crafty and making your own quilts, garments, decorations, and more – then we are sure that you’ll agree with us when we say that sewing machines, quilting items, and all the other various equipment that you need to quilt and sew are already super expensive!
This is especially true if you want to get good-quality gear.
On top of all that, sewing and quilting equipment also tends to take up a lot of space – and the list of items that you need for each new project can often seem never-ending.
So, with that being said, If you don’t have much space or budget, then you might consider building a DIY sewing and quilting table instead of investing in an expensive, brand new one.
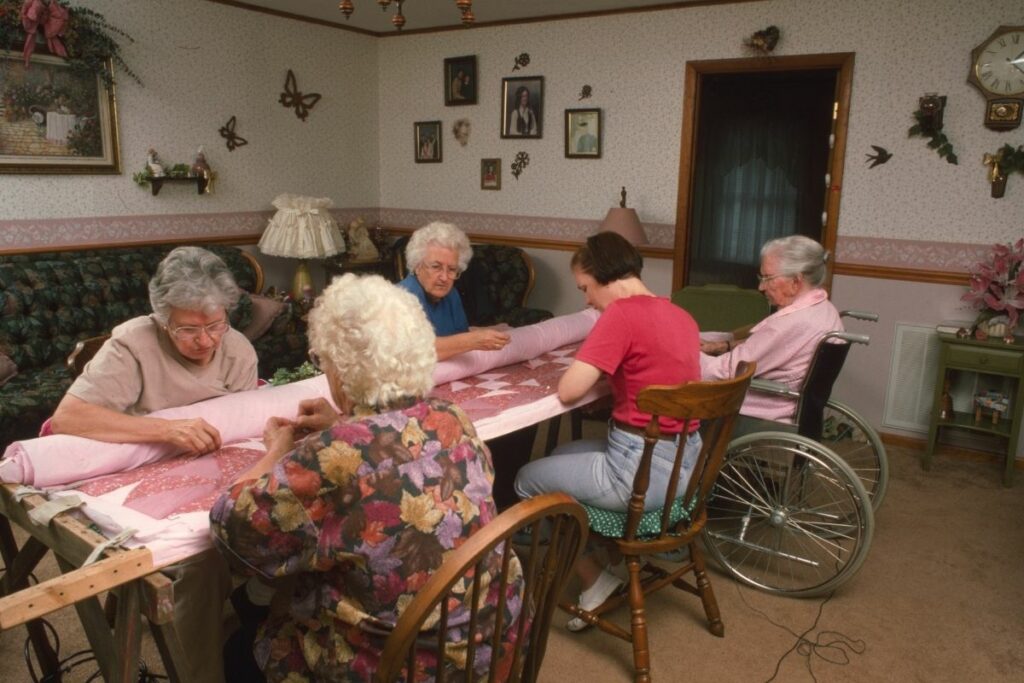
A sewing and quilting table is a real essential for anyone who wants to be able to sew their own clothes or quilt in an organized working area.
There’s no “one size fits all” when it comes to having your own craft table, and the good news is that they come in various shapes and sizes – including free-standing, wall-mounted, portable, and plenty more.
You can easily create a sewing table using some basic materials and tools. This way, you won’t have to spend too much money and time.
With the right design, it will be easy to make your sewing table look elegant and attractive.
The only question is, how should you make your very own affordable sewing and quilting table without breaking the bank?
This is where we come in to lend you a helping hand! In this guide, we are going to be showing you how you can easily make your very own affordable sewing and quilting table from the comfort of your very own home.
Along the way, we are also going to be sharing with you some additional tips that will help you to get the most out of your sewing and quilting experience.
Read on!
What are the Benefits of Using a Table for Sewing, Quilting and Other Crafts?
There are many reasons why you would want to use a table as opposed to a floor or even a countertop to work on. One of the main ones is that tables are generally easier to clean.
You can easily wipe down a table surface after every project to keep it looking nice and tidy. Plus, because there aren’t any sharp edges around a table, you can rest your hands and arms comfortably while you’re working.
Another benefit of using a table is that you can actually see what you’re doing. When you are working at a desk or countertop, you tend to focus on whatever is directly in front of you.
That means that you may not always notice small details like stitches, seams, and stitching lines. However, when you are working at a table, you can see everything clearly.
Another reason why you should choose to build your own sewing and quilting tabletop is because you can customize it according to your needs.
For example, if you are planning on creating lots of different projects, then you probably want to invest in a larger table so that you can store all of your supplies and equipment safely.
On the other hand, if you just plan on sewing and quilting for fun, then you probably don’t need a large space. Instead, you could opt for a smaller tabletop that doesn’t require a lot of storage space.
When choosing a table, it is important to think about how big you plan on making it. A bigger table allows you to do more things at once. It will also give you more room to move around.
If you are planning on building a small table, then you might want to consider buying a folding table instead. These types of tables are ideal for people who want to save space but still enjoy crafting.
If you are looking for a cheap DIY sewing and quilting desk, then you might want a freestanding table. Freestanding tables usually come in two varieties: metal and wood.
Metal tables are perfect for those who live in areas where they receive plenty of direct sunlight. They are also great for people who want to display their creations. Wood tables are often used by crafters who prefer a classic look.
If you are looking for an inexpensive DIY sewing and quilter’s table, then you might have better luck finding one online than in stores.
There are many websites that sell these preloved tables, and you can frequently find them from these marketplace-style online stores for less than $100.
The best part is that you can customize the size of the table based on your preferences!
With that being said, you also have the option of building your very own sewing and quilting table entirely from scratch, which can sometimes even be cheaper! This brings us to our next section:
How To Make A Cheap Sewing And Quilting Table: Step-By-Step Instructions
Step 1: Choose What Material You Want
The first thing that you’re going to need to do before you start building your sewing and quilter table is to choose what type of material you would like to use.
You can go for wood, metal, plastic, glass, etc. Whatever you decide on, just make sure that it has enough strength to support your weight.
It doesn’t matter whether you opt for a solid piece of wood, or a wooden frame covered by plywood, as all materials perform well when used to make a table.
However, you might want to ask some of your crafts friends what they recommend, as there are a variety of different materials for you to choose from – and you might discover that there are some better-suited to sewing and quilting than others.
Step 2: Measure Your Space
Before you start buying any materials, you need to measure the available space in your room. Make sure that you have enough space to set up your sewing machine, fabric storage bins, cutting boards, ironing board, and so on.
Also, make sure that there’s enough space around your worktable for you to move freely. Don’t forget about the electrical outlets either!
Alongside all of this, you might also want to think about whether, or not, you’d like to install any additional forms of storage around your table.
For example, if you have a lot of sewing and quilting equipment that you’d like to store but you feel as though you’re not going to have enough room to keep it on your table’s countertop once it has been built – leaving room for a chest of drawers either side your table might be extremely beneficial.
Step 3: Purchase The Tabletop Material
Once you’ve measured your space, it’s time to cut your wood into pieces. Remember that you can always add more pieces later on, but you cannot remove them once you’ve started assembling your sewing table.
For now, focus on creating the base, which includes two legs, a tabletop, and a shelf.
This step is more than likely going to be the hardest part of this table project, so if you find yourself struggling, why don’t you consider asking someone with experience in cutting material to size for assistance?
Alternatively, you could even opt to purchase your chosen tabletop material from a local homeware store, where the store assistants will usually be able to cut it to size for you for a small fee.
If you’re still unsure about which material to use, then we recommend opting for wood as it is the most affordable out of the various types that you can use.
Step 4: Attach Legs to Base
Now that you’ve got all the necessary pieces ready, it’s time to attach the legs to the base. To ensure that everything stays put, make sure that you drill holes at both ends of the leg.
Then, screw the legs onto the base. Once you’ve done that, you’ll want to sand down the edges of the base to smooth things out.
Ideally, we also recommend that you consider purchasing the table legs from your local homeware store, as it can be pretty difficult to make them if you don’t have any experience and they need to be the exact measurements to ensure that the table is level and stable enough for you to work on.
Step 5: Add Shelves
This step is entirely optional, but we do recommend that you consider it.
Next, after you have finished attaching the legs to the base of your table’s countertop, you’ll want to add shelves to the top of the table if you are interested in installing some additional storage in your sewing and quilting workspace.
These shelves will hold your sewing supplies such as scissors, needles, threads, rulers, and anything else that you would like to keep organized and housed in one space.
Depending on how many shelves you’d like to include, you may want to consider purchasing pre-made shelves.
However, if you don’t mind making your own, then feel free to do so. If you’re planning on adding more shelves later on, then you might want to think about attaching them directly to the sides of the table instead.
Installing shelves is a super useful way to keep all of your sewing and quilting equipment organized and out of your way while you work, while still being in arms reach in the event that you need to use something on the fly.
Step 6: Install Electrical Outlets
Finally, you’ll want to install electrical outlets near the center of the table. When you’re installing these outlets, make sure that they’re positioned close to each other.
That way, you won’t have to run extension cords across the entire length of the table.
What Are The Best Types Of Sewing And Quilting Tables?
If you don’t want to build your own table, then the good news is that there are several different types of sewing tables available today. Here are some of the most popular ones.
Free Standing Tables
These are great because they allow you to position yourself anywhere within the room. You also get an extra surface to work on, which makes these ideal for those who sew by themselves.
Portable Tables
These tables fold up and fit inside a suitcase or small bag. They’re perfect for traveling since you don’t have to worry about dragging along a bulky sewing table.
Stool Tables
These are similar to portable tables, except that they come with a stool attached. This allows you to sit comfortably while you sew.
Stationary Tables
These tables are large enough to accommodate multiple people. They usually feature built-in lights, power outlets, and storage areas. It Is great for collaborative working.
Foldable Tables
These tables fold flat against the wall. They’re great for smaller rooms, but they aren’t very sturdy.
Wall Mounted Tables
These tables mount onto the wall, allowing you to use them without worrying about getting in the way of furniture.
How Should You Organize Your Sewing and Quilting Table?
When it comes to organizing your sewing and quilting table, you really only have two options. The first option is to keep everything in one place.
While this works well when you’re working alone, it becomes problematic when you’re collaborating with others. In that case, you’ll want to create separate spaces for different projects.
The second option is to group items according to their function. This means that you’ll be able to find specific tools easily.
For example, you could group your sewing machine and accessories together, while keeping your fabrics and notions in another area.
If you’re looking for inspiration, here are some organization tips:
1. Use baskets or containers to store small items – This is a great way to keep some threads, buttons, and needles handy on your countertop.
2. Create designated areas for storing larger items – We’ve briefly touched upon this already! You should consider storing your larger items in designated areas – such as on a shelf.
3. Group similar items together – This is a super useful tip that we’re sure you’ll greatly benefit from. Sewing and quilting equipment can easily start to get disorganized and messy if you’re not careful – so you should be sure to keep similar items grouped together so that you do not get muddled up or confused.
4. Keep your workspace clean and organized – After each sewing or quilting session, make sure that you are cleaning and tidying up your space. This will ensure that it will be neat and organized when you return to it.
5. Label your tools – Labeling your tools is something that many people overlook, but you’ll be surprised at how useful you will find doing so to be! By labeling your tools, you’ll know exactly where they go and what they’re used for.
6. Consider using a pegboard system to help you keep track of your various sewing materials – This is another great option for those who do not have much storage space. A pegboard can be placed above your table, and you can attach various supplies to it without taking up too much space or room.
8. Invest in a good quality toolbox – Alongside creating your very own sewing and quilting table, why don’t you also make sure that you are investing in a toolbox, too? This will help to make sure that you are able to keep all of your equipment in one place without losing anything.
These types of toolboxes are also often designed specifically with sewing and quilting in mind, so you’ll find a range of different storage options within the toolbox specifically optimized for your particular equipment. Clever or what?
9. Don’t overdo it; try not to clutter your work surface too much – To make sure that your workspace does not become cluttered or messy, you should be sure to regularly clear out items that you do not need anymore. If you do not want to waste anything, then you could always donate it.
10. You can also use a hanging file cabinet to keep your files neat and tidy – Do you run a business or like to use vision boards for sewing and quilting projects? If you do, then using a hanging file cabinet might be super useful to you. If you run a business, you could use the file to pin all of your customer’s orders, and if you simply have a hobby, you can pin inspiration and ideas for your future projects.
11. Finally, remember to label your drawers and cabinets – This is the final tip that we have for you. Labeling your storage will make sure that you know where everything is. Alongside this, you should also consider labeling your actual equipment so that it can be organized according to sewing or quilting.
How Much Does It Cost To Build Your Own Sewing And Quilting Table?
The answer to this question will ultimately depend on how much equipment you need, how large you need your table to be, as well as whether, or not, you already own a table that can be of use to you.
If you do not currently own a table, then it is likely that you are going to need to spend around a hundred dollars or so on a new table.
However, if you already have a table that you want to use to make your sewing and quilting table, then the amount that you spend will be significantly lower.
What Other Storage Options Can I Use Alongside A Table?
Alongside all of the above, you will also need to think about what type of additional storage you might like to keep your equipment inside.
As you will have seen from above, we strongly recommend that you opt to store the majority of your sewing and quilting equipment inside shelving that you can keep both above and underneath your table – although there are a variety of other options that you can consider as storage if you’re looking for the best bang for your buck.
Of course, you also have the option of not opting for any additional storage, although you’re more than likely going to discover that you will need to invest in some additional storage so that you can keep all of your equipment organized.
Here Are Some Storage Ideas You Could Consider Using Alongside Your Sewing and Quilting Table
A Chest of Drawers
If you’ve got the space, then opting for a chest of drawers that you can keep alongside your sewing and quilt table would be a good idea.
It’s important to note that you should only choose one drawer per side of your table, otherwise you’ll end up having to move your entire table to access your supplies.
This is a smart option to consider if you have the space and need to keep a variety of different crafting equipment safely housed and organized.
We think that small business owners would greatly benefit from placing drawers in their workspace.
Shelves
You could also opt to go for shelves instead of drawers. Again, you’d need to ensure that you only place one shelf per side of your table.
Even though we have already briefly touched on this in a previous point, installing shelves directly above your table will be immensely helpful for keeping all of your supplies neatly stored in one place.
Cupboards
Another option that you may wish to consider is to install cupboard doors above your sewing and quilter table. Although these types of cabinets are often used for storing kitchen utensils and suchlike, they could work just as well for storing your sewing and quilted items.
They can either be installed directly above your table or you could even opt to install them below your table.
Hooks
If you don’t have a lot of space but you would like to be able to keep some of your sewing and quilting supplies near your table, you could also opt to install some hooks directly above it.
This is a great option for anyone that doesn’t have a lot of space around their table, but would still like to have some supplies organized, off the ground and within arms reach.
Drawer Organizers
Another innovative storage idea for you to consider is to purchase a drawer organizer.
These organizers are extremely useful for keeping your sewing and quilting materials neat and tidy because they allow you to easily organize your tools into separate compartments.
Some of the most popular brands include Craftmade, IKEA, and The Container Store.
Drawer Units
Finally, you could also opt for a set of drawers. These are typically made out of wood and come with various sizes of drawers that you could use to organize your sewing and quilters tools.
As you can see, there are many ways that you can create a cheap sewing and quilting workstation.
By carefully considering what you need from your table, where you plan to put it, and by taking into account the type of storage that you want to keep your equipment inside, you should be able to find a solution that works
Additional Tips For Optimizing Your Sewing And Quilting Workspace
Now that you know how to make your very own sewing and quilting table, before we part ways – we also want you to consider some other ways that you can organize your sewing and quilting workspace.
By optimizing it to suit your preferences and needs, not only will you find your crafts area to be relaxing and inviting, but you will also more than likely find that you are much more productive while you are in there, too.
So, with all that being said, here are some additional ways that you can help to organize and optimize your sewing and quilting workspace below:
Lighting
Lighting is an important aspect when it comes to creating a welcoming and comfortable environment. When choosing your lighting, think about what kind of mood you want to create.
Do you prefer soft light? Or do you prefer bright lights?
Whatever kind of mood you choose, make sure that you have enough lighting so that you can comfortably work and safely see all the different equipment you are working with, such as your sewing machine.
You should ensure that your table is well lit with a lamp, and if possible, you should try to position the table so that it is as close to a window as possible – as this will ensure that it gets plenty of natural light during the day.
As a side note, if you are lucky enough to have a room or studio space, then you could also opt to use a variety of different mood lights in other areas of your workspace, such as fairy lights or LED color-changing strips. This will help you to make your working environment relaxing and personal to you.
Organize Your Supplies
As mentioned earlier, one of the best things that you can do to improve the overall look and feel of your sewing and quilt workspace is to organize your supplies. In order to do this, you could either invest in some sort of toolbox or you could simply buy a small plastic bin and fill it up with everything that you need.
If you decide to go with the latter option, you could even add labels so that you can easily identify them later on.
If you don’t have any extra space in your home, you could always get creative and store your supplies in containers that you already have around the house.
For example, you could use old boxes, baskets, or even old shoe boxes. The key thing to remember is that whatever container you use, just make sure that they are sturdy and strong enough to hold all of your supplies without breaking.
Separate Sewing Machine Storage
Another way that you can help to optimize your sewing and quilt space is by investing in some type of storage for your sewing machine. There are many options available to you, including a simple cabinet, a closet, or even a dresser drawer.
However, if you plan on using your sewing machine often, then it’s probably best to invest in something like a sewing cabinet.
These cabinets come in various sizes and styles, and they can be used to store anything from your sewing machine to your accessories.
They are also ideal for storing away your fabric, thread, and other materials while you are not actively using them.
Separate Quilting Storage
Finally, another great way that you can help yourself to organize your quilting space is by investing in a few shelves.
Whether you decide to go with wooden or metal shelves, these types of shelves are perfect for holding your fabrics, patterns, and other items that you may need at hand while you are quilting.
Just make sure that you keep your shelves clean and organized so that you can quickly find the items that you need.
The Bottom Line
That’s it! Now that you’ve finished building your sewing and quilt table, you should be able to enjoy working on projects while being able to enjoy the convenience of a dedicated workspace that is going to allow you to safely complete all of your sewing and quilt projects.
Of course, this might not be the easiest project to complete, especially if you’re not very handy with tools.
But, so long as you make sure that you are following all the steps that we have talked you through above, you’ll be able to build your new affordable sewing and quilting table in no time at all.
So, why wait? Start enjoying your new sewing and quilting table today!
Thank you for reading. We hope this information has helped you!
My name is Sarah Maine and my hobby is quilting. No, I’m not retired - I’m in my early 20s and have been quilting since I was a teenager! Quilting and sewing are incredibly underrated hobbies in my opinion - and I want to bring them back.

")


 Guide To The Best Sewing Thread")

